Please read this article if you do now know how to connect everything and make secure connection, but also if you have done everything and you have the internet connection, because you might have done something wrong, which can lower the performances. I am going to show how to connect when you have IPTV, ADSL and telephone, all to the same telephone line.
ADSL, quality and speed
The first rule that affects performances is that your house/office is not too far from the internet provider’s station. The typical “good” distance is under 4km, although the true recommended one is below 2km (1km = 1.6mi). Above 8km the line is practically not working.
Another rule is that your provider should use ADSL2+ standard. ADSL1 has limit up to 8Mbps, while ADSL2+ has theoretical limit to 24Mbps. Bear in mind that those limits are only theoretical, and that you can only get speeds below it.
Speed also depends on gauge of the cable used by the provider, the type of the cable, and quality of the splitters. Provider will test those prior to your agreement with them. The speed that they determine is the maximum is truly maximum for your, and then you can determine what you can get for your money.
Example: You have both IPTV and ADSL, you have paid for 8Mbps internet connection. IPTV requires 4Mbps for non-HD channels. If everything stated above says that you cannot provide with 12Mbps, you will see a drop of the speed in your internet. IPTV will off course work fine. So you must calculate your priorities first, if you have a line and provider that are not so great.
ADSL1 works at lower frequencies than ADSL2. If the line from the provider is not of good quality and there is a lot of electronic noise, you might be better off with the older standard. ADSL1 is the more stable type.
ADSL stands for Asymmetric Digital Subscriber Line, Asymmetric meaning that your upload and download speed are not the same, as with DSL (SDSL). It is an optimization, since you are more likely to download data than upload it. Unfortunate is that the differences are quite large, approximately 8:1. For example, for 8Mbit connection you will get 1Mbit of upload bandwidth. This does not work well with uploaders and those that are using P2P and torrents, since their upload to download ratio will be poor.
Connection Basics
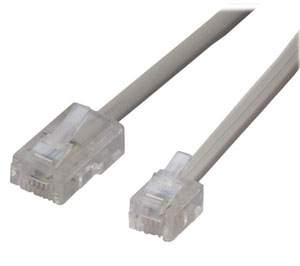

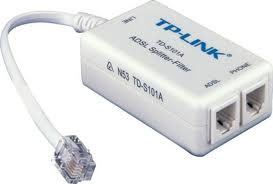
RJ11 is telephone connector, RJ45 is the UTP (LAN) cable connector. They look the same, but RJ45 is significantly larger than RJ11.
ADSL Splitter separates phone’s signal from Internet signal. For every telephone, there must be some Splitter before it. If you have multiple phones, there are two solutions:
1. after ADSL splitter, connect telephone splitter and in telephone splitter on the other end, connect all telephones you have,
2. for each phone, use ADSL splitter.
Use whichever is more convenient for you. Both types of splitters are cheap to buy, 2-4$, so that should not be an issue.
IMPORTANT: failing to connect phone in this way may result in loss of connection and reduced speed. I have tested this myself, with improper connection IPTV freezes when there is a call, internet connection drops down, and when IPTV is working (not phone call related), it halved my internet connection speed. All this was corrected as soon as I returned splitters before all my phones.
Practical cases
Practical case 1: ADSL line: Internet and telephony, no IPTV
What you get:
1. ADSL Splitter,
2. ADSL modem,
3. phone cables.
Below is the schematics of how you should connect everything if you have only one phone.
If you have multiple phones, read the “Connection basics” chapter.
Practical case 2: IPTV and telephony
It’s very simple, just like with “case 3”, but you don’t get the internet. You will still get ADSL modem.
Practical case 3: ADLS line: Internet, IPTV and telephony
Everything like the “case 1”. Just connect the IPTV with LAN cable to the ADSL modem.
WiFi Configuration
It depends on which modem you have, but it will probably have the WiFi 2.4GHz and maybe a button on it to start the WiFi (the case on Huawei HG520 and HG530, for example).
First to connect to your ADSL modem/Wifi router. Most of them use IP address 192.168.1.1, but newer TP-Links have 192.168.1.254 as default. It will ask for a user name and password, which are provided by the internet provider. This password is something generic, and you are advised to change it if possible, if that option is not locked in firmware.
The chances are that DHCP (something that gives IP address to whatever connects to it) is already on, so the only thing we should do is set up password for wifi to make it somewhat secure.
For the type of the password chose WPA2 Passphrase, and enter whatever you like. Do not chose WEP, they consist only of numbers and can be cracked even by an amateur. There are tools for cracking WEP code, it is based on the Brute Force (try and see if it works) Attack, and you can even download LiveCD Linux distribution called Backtrack that will do the configuration and installation for you. Drawback is also that everybody can see what type of connection you are using, so if you are using WEP, they know that it can be cracked (I am not using the popular terms “hacked”, “hackers” and “hacking”, because they mean something quite different, as explained by Richard Stallman).
Save, restart the modem, connect and you are good to go.
I prefer to use Google’s and OpenDNS’s, DNS service. In your computer, in connection properties in Windows, or “edit connection” in Ubuntu, set DNS1 to 8.8.8.8 and DNS2 to 208.67.222.222, it might speed loading of your web pages.
At the end, go to www.speedtest.net and check how fast it goes.